Whether you’re a product manager mapping customer user flows, an HR manager building an org chart, or an engineer diagramming your AWS architecture, here are a few tips and tricks for creating and collaborating on diagrams in Lucidchart.
Hack #1: Edit your whole diagram at once
Don’t waste time formatting your diagram shape by shape. For example, you have a process diagram, but one of the boxes isn’t quite large enough for the text. You don’t want that single box to be larger than all the others, and you also don’t want to spend your afternoon resizing every single box.
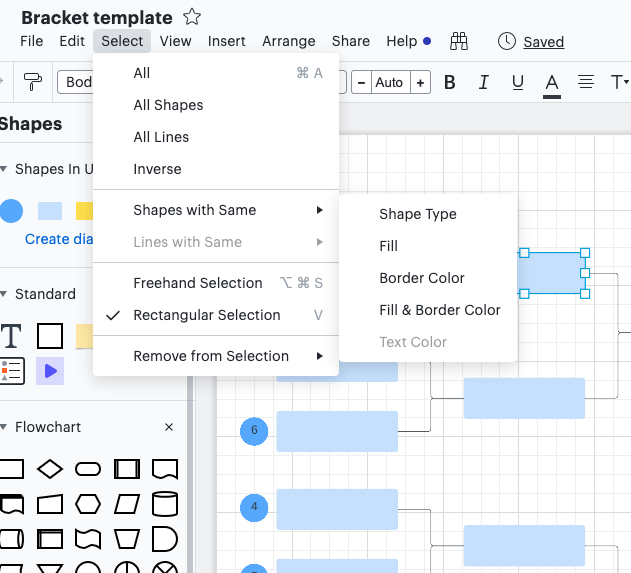
Simply click the shape and go to “Select” in the menu bar. Then go to Shapes with Same > Shape Type or one of the other options to select a particular set of shapes in your diagram. From this point, you can resize all the shapes to match so that your diagram looks neat and professional.
This hack doesn’t just work for resizing shapes—try it out to also change shape, text, and line styles or color all at once.
Hack #2: Use layers to organize your content
With layers, you can organize the content of your Lucidchart diagrams in a way that conveys a lot of information without overwhelming your canvas. Layers allow you to overlay different elements of a diagram all in one place instead of having to use different tabs and documents. For example, you could use layers to build out a current and future state in one document, show different phases of a process or subprocess, and more.
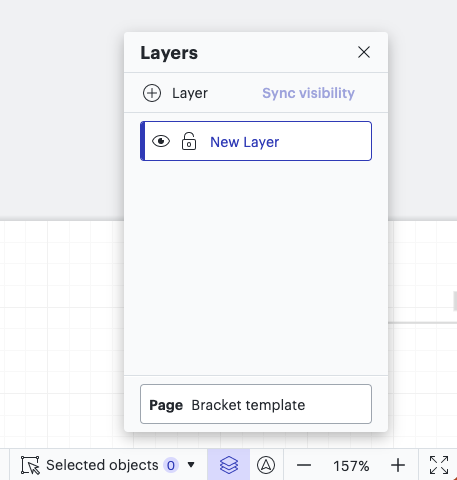
Get started by navigating to the layers icon in the bottom right of the Lucidchart canvas (it’s the icon that looks like a stack of papers). Click + Layer to add your base layer that everything else is built upon.
As you build out your layers, you can rename, delete, reorder, lock, and hide them as needed.
Hack #3: Stay in control with revision history
When you have a whole team working on a document, your diagram is bound to be changing rapidly. Thanks to revision history, you’re in control of your document even when you’ve invited others to collaborate.
By selecting the clock icon at the top of the canvas, you can access every single revision made to the document. When you click on a timestamp and the corresponding name, you’ll see what your document looked like at that point in time.
If you need to get back to that selected diagram state, click the Restore button to revert your document back.
You can also click the New from Version button to create a new document from any desired revision point.
Hack #4: Share via URL
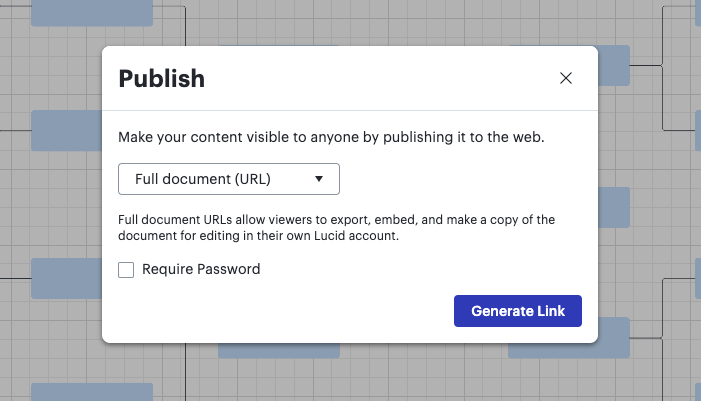
Sometimes you need to share documents with people who don’t have a Lucidchart account. When you open the “Share” menu, select Publish and then Generate Link. You now have a live URL anyone can use to view a document without signing into Lucidchart.
Anyone with the URL can navigate all the pages of the document and bookmark the URL for future use. The best part is that whenever you make a change in Lucidchart, changes are live for those using the URL even before they refresh the page. This hack is an easy way to keep everyone involved and in the loop even while your document is constantly changing.
Hack #5: Use Feature Find to locate the right tools
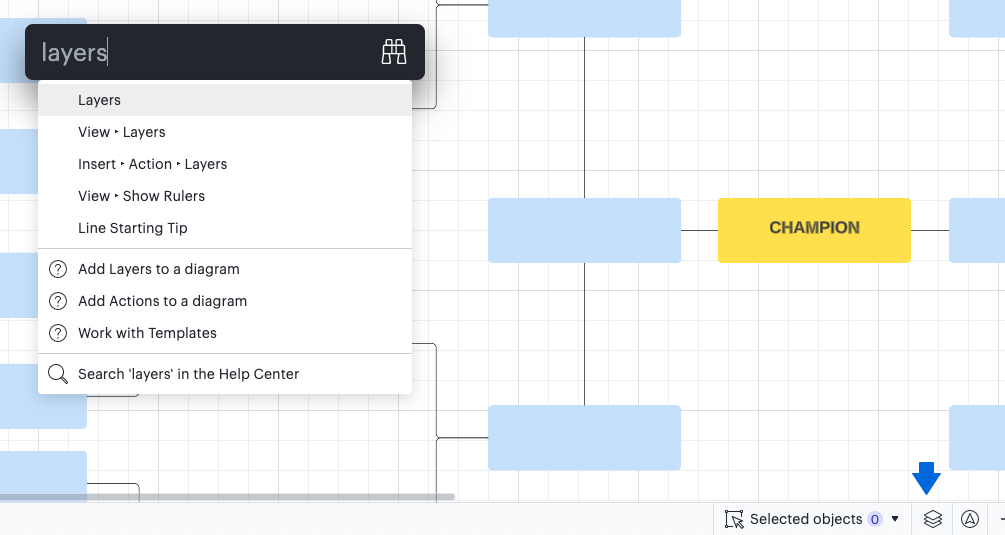
If you don’t know where to find a feature mentioned in this post (or any other feature), click the binoculars icon at the top of the canvas to activate Feature Find. Then type what you’re looking for, such as “layers.” Feature Find will come up with a list of feature suggestions and help center links, and an arrow will pop up pointing to that feature in your Lucidchart editor.

Jump into Lucidchart to try these tips for yourself!
Sign inAbout Lucidchart
Lucidchart, a cloud-based intelligent diagramming application, is a core component of Lucid Software's Visual Collaboration Suite. This intuitive, cloud-based solution empowers teams to collaborate in real-time to build flowcharts, mockups, UML diagrams, customer journey maps, and more. Lucidchart propels teams forward to build the future faster. Lucid is proud to serve top businesses around the world, including customers such as Google, GE, and NBC Universal, and 99% of the Fortune 500. Lucid partners with industry leaders, including Google, Atlassian, and Microsoft. Since its founding, Lucid has received numerous awards for its products, business, and workplace culture. For more information, visit lucidchart.com.
Related articles
5 steps to build a next-level product roadmap in Lucidchart
Use this guide to build a product roadmap in Lucidchart. Includes instructions on how to link data, use smart containers, and add conditional formatting. Roadmap templates included!
Getting started in Lucidchart: the basics
Ready to learn the basics of diagramming in Lucidchart? You’re in the right place. Take 15 minutes to review our tutorials and become a Lucidchart pro.
8 best practices for collaborating in Lucidchart
Whether you are improving a process, creating an org chart, or trying to stay aligned with your team as you work remotely, Lucidchart is the place for effective visual collaboration.
Bring your bright ideas to life.
By registering, you agree to our Terms of Service and you acknowledge that you have read and understand our Privacy Policy.
