Lucidchart, a cloud-based intelligent diagramming application, is a core component of Lucid Software's Visual Collaboration Suite. This intuitive, cloud-based solution empowers teams to collaborate in real-time to build flowcharts, mockups, UML diagrams, customer journey maps, and more. Lucidchart propels teams forward to build the future faster. Lucid is proud to serve top businesses around the world, including customers such as Google, GE, and NBC Universal, and 99% of the Fortune 500. Lucid partners with industry leaders, including Google, Atlassian, and Microsoft. Since its founding, Lucid has received numerous awards for its products, business, and workplace culture. For more information, visit lucidchart.com.
Project management timelines provide a visual overview of projects and increase team efficiency. Learn 8 easy steps to build a project management timeline to perfection.
By registering, you agree to our Terms of Service and you acknowledge that you have read and understand our Privacy Policy.
Think back to memorizing major events in your history class (we apologize in advance for any painful memories this exercise might resurface). Rather than stare at a jumble of dates in your textbook, you likely found or created a timeline clearly spelling out what happened when.
While you may not have a pressing need to memorize WWII dates anymore, timelines make it easy to visualize any event or project, including major milestones, due dates, and dependent tasks. And to keep your team on the same page, the timeline needs to live in an application where everyone can easily access it throughout the project lifecycle—an application like Google Docs.
In this article, you'll how to make a timeline in Google Docs in two ways: with Google Drawings or using the Lucidchart add-on.
Option #1: Use Lucidchart to make a timeline in Google Docs
Lucidchart integrates with Google Workspace, so you can use our visual workspace to easily add professional timelines to any document. Here's how to make a timeline in Google Docs with the Lucidchart add-on.
Before you begin, you’ll need to install the Lucidchart add-on. Follow these steps so you can add and start brand-new documents without leaving Google Docs.
Open a Google Doc.
Select Add-ons > Get add-ons.
Find and select Lucidchart.
Give Lucidchart permission to access Google Docs.
Log in to Lucidchart and give Google Docs permission to access your documents. Once you’ve completed this process, you’ll see it appear as an option in the Add-ons menu.
How to insert a timeline using the Lucidchart add-on
Once you've installed the add-on, inserting a timeline into your document is a breeze.
Open a Google Doc and click where you want to add your timeline.
Go to Add-ons > Lucidchart Diagrams > Insert Diagram.
A sidebar will appear. Choose the timeline you want from your list of documents, and press “+.”
Preview your document, and click “Insert.”
If you need to go back and make changes to your timeline, go to Add-ons > Lucidchart Diagrams > Update Inserted Diagrams. This will ensure that your timeline is accurate and up to date.
How to create a timeline in Google Docs using the Lucidchart add-on
If you need to create a new timeline, the Lucidchart add-on can help you with that, too. It will give you access to the Lucidchart editor, where you can find templates and drag-and-drop shapes to quickly build out your timeline.
From your Google Doc, select Add-ons > Lucidchart Diagrams > Insert Diagram to open the sidebar.
Click “+” in the bottom-right corner.
Select a blank document or a timeline template to customize. (We have included some of those templates at the end of this article.)
Modify the template or drag and drop shapes to create a timeline of events.
Once your document is complete, return to your Google Doc. Select the timeline you’ve just created from the sidebar, and press “+” to preview and insert it into the document.
Have more questions about installing or using the Lucidchart add-on? Take a look at our Help Center or watch a brief video tutorial below.
Option #2: Use Google Drawings to make a timeline in Google Docs
If you would prefer to create your timeline directly in Google Docs, you can use Google Drawings. Just keep in mind that, with no templates and a limited number of shapes, it could be more difficult or time-consuming to build your timeline.
Follow these steps to get started:
Open a Google Doc.
Select Insert > Drawing > New.
Click the shape icon to add the shapes you need. Once you select a shape, additional formatting options will appear, and you can double-click on any shape to add text.
When you’re done, click “Save and Close.”
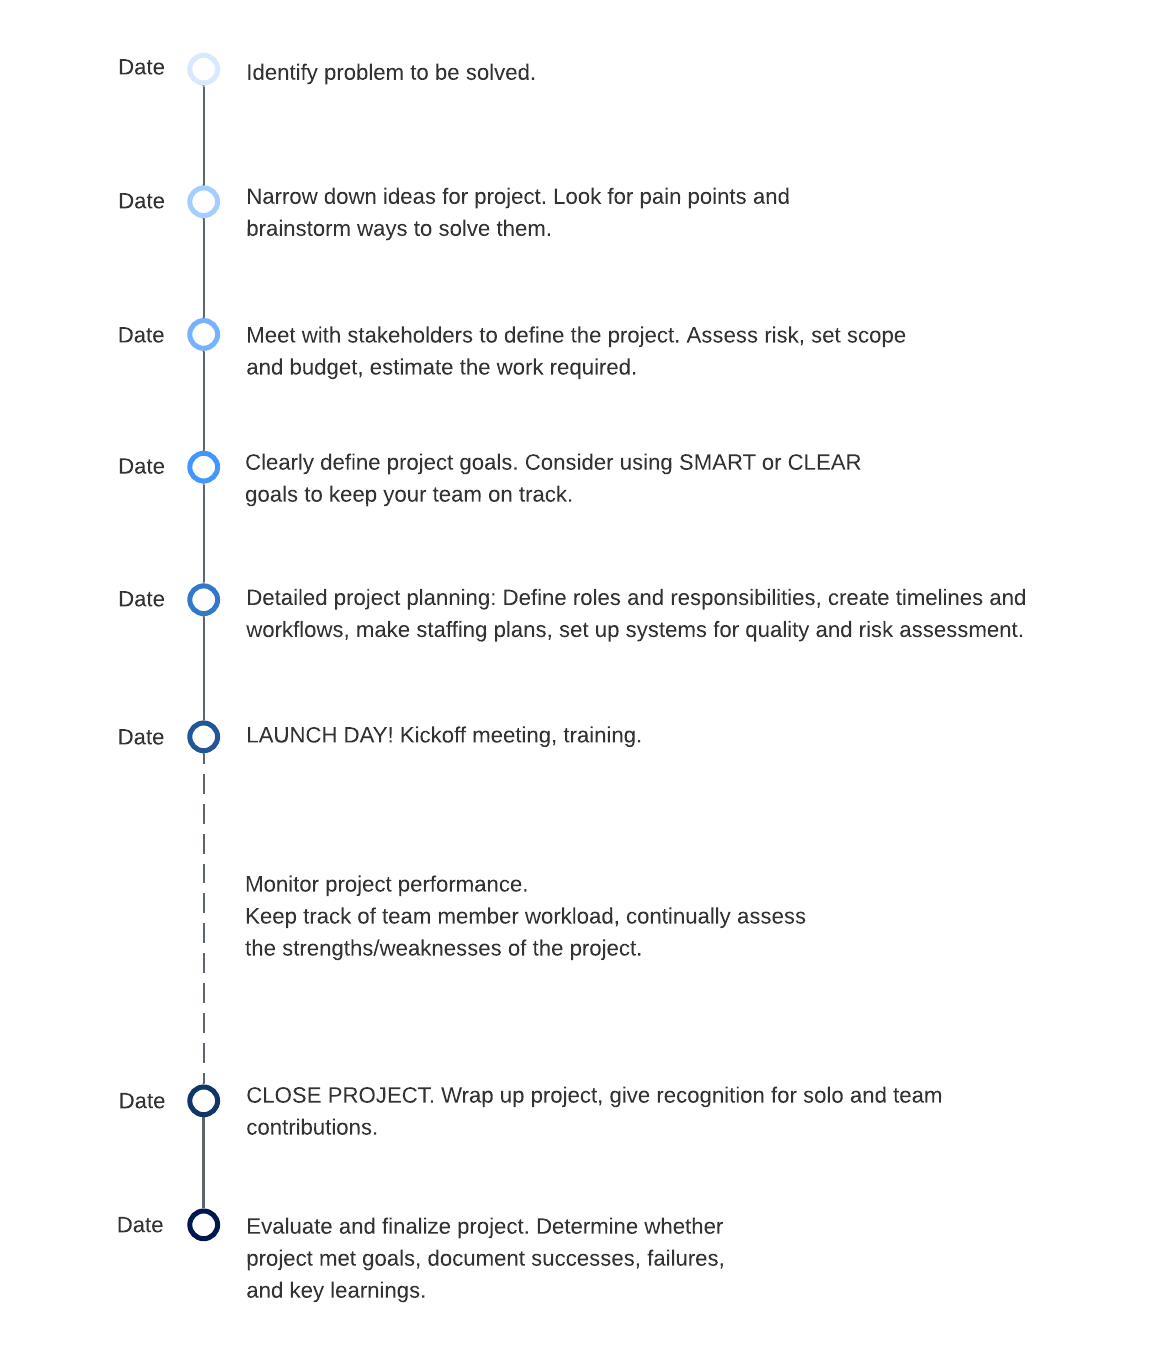
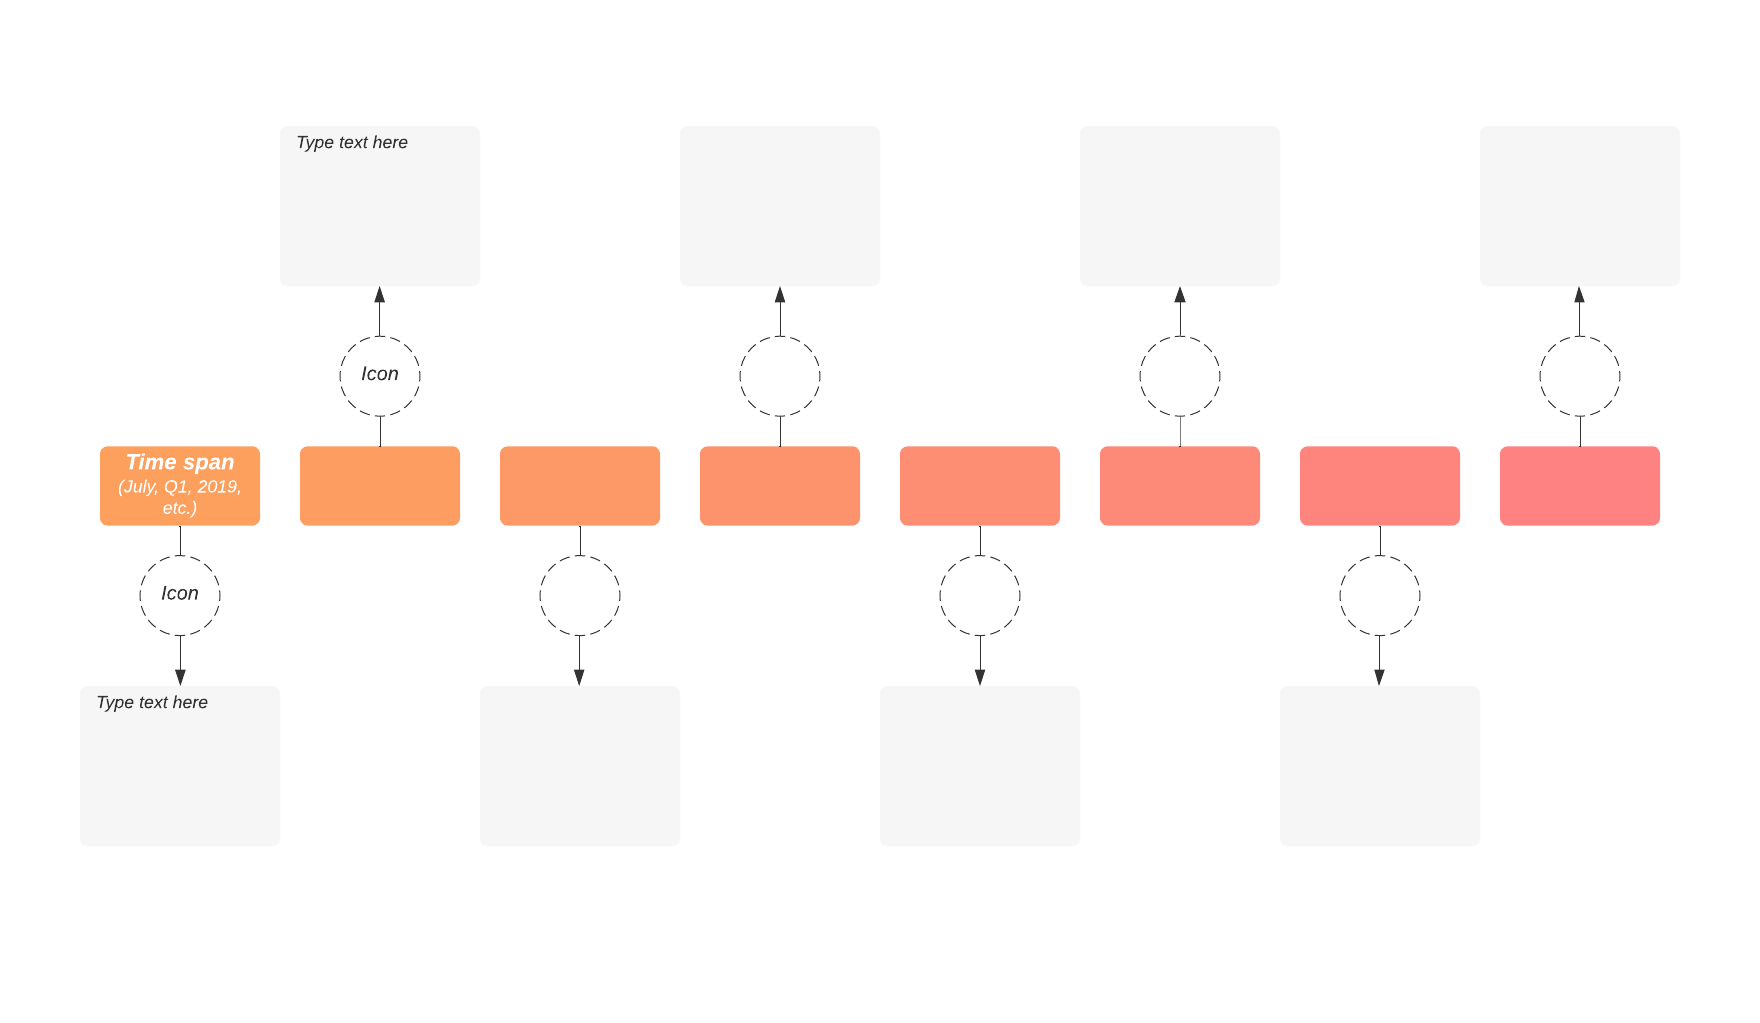
Timeline examples and templates
Get started on the right foot and save time by using one of our customizable templates. Simply click on the template you want to use to open it in your Lucidchart account and start editing.
You don’t have to painstakingly arrange shapes, lines, and text to create a timeline in Google Docs. Lucidchart gives you access to dozens of timeline templates to quickly update changes, hit milestones in real time, and collaborate with others.
Learn more about timelines and how they can support your projects.